CLICK HERE FOR FREE BLOGGER TEMPLATES, LINK BUTTONS AND MORE! »

Thursday, August 18, 2011

Mustache Cupcakes

This is a quick little post just to show you what I am up to tonight. My fabulous oldest son is turning 12 this weekend and, as per tradition, requested cupcakes to share with his class. My kids LOVE doing this! They have fun choosing different themes for their cupcakes each year and this time my son liked the mustache idea. So... I made 34 mustaches in 3 different shapes, in 4 different "hair" colors. I just free-handed some patterns and then cut them out with my favorite sharp scissors.

I can't believe my baby boy is such a grown up young man all of a sudden. I mean, 12 is a big deal! He is already taller than me and is just beginning his growth spurt!! Someone call the NFL, quick!! Haha. He is a special needs kid, Autism Spectrum Disorder and ADHD, and has required a lot of extra attention and patience through the years. But I will say it has all been worth it- every single second!! I am loving the sweet caring intelligent person that he is. Very proud to be blessed with my Evan. :) Happy Birthday kiddo! I love my little Evan Monkey! (He does not like it when I call him that anymore... but he doesn't read my blog, generally, so I am FREE to be sentimental...)

**UPDATE:  Report on the 12 year old's birthday: We had Slurpees, listened to LOUD music and cruised around singing even louder (and I was only slightly embarrassed,) played demo video games at Target for about 100 years (or so it seemed, lol,) and... get this... bought. him. a. cell. phone. Ugh. A pay as you go one, but still. Gotta start somewhere. I can't believe he is old/mature enough to have one. Geesh.
Now on to making deep dish pizza and a poke cake. :)

To be honest, it is kind of nice when your child asks to keep it simple. Takes a lot of pressure off of the mama. I love that boy. ;-)

Saturday, August 13, 2011

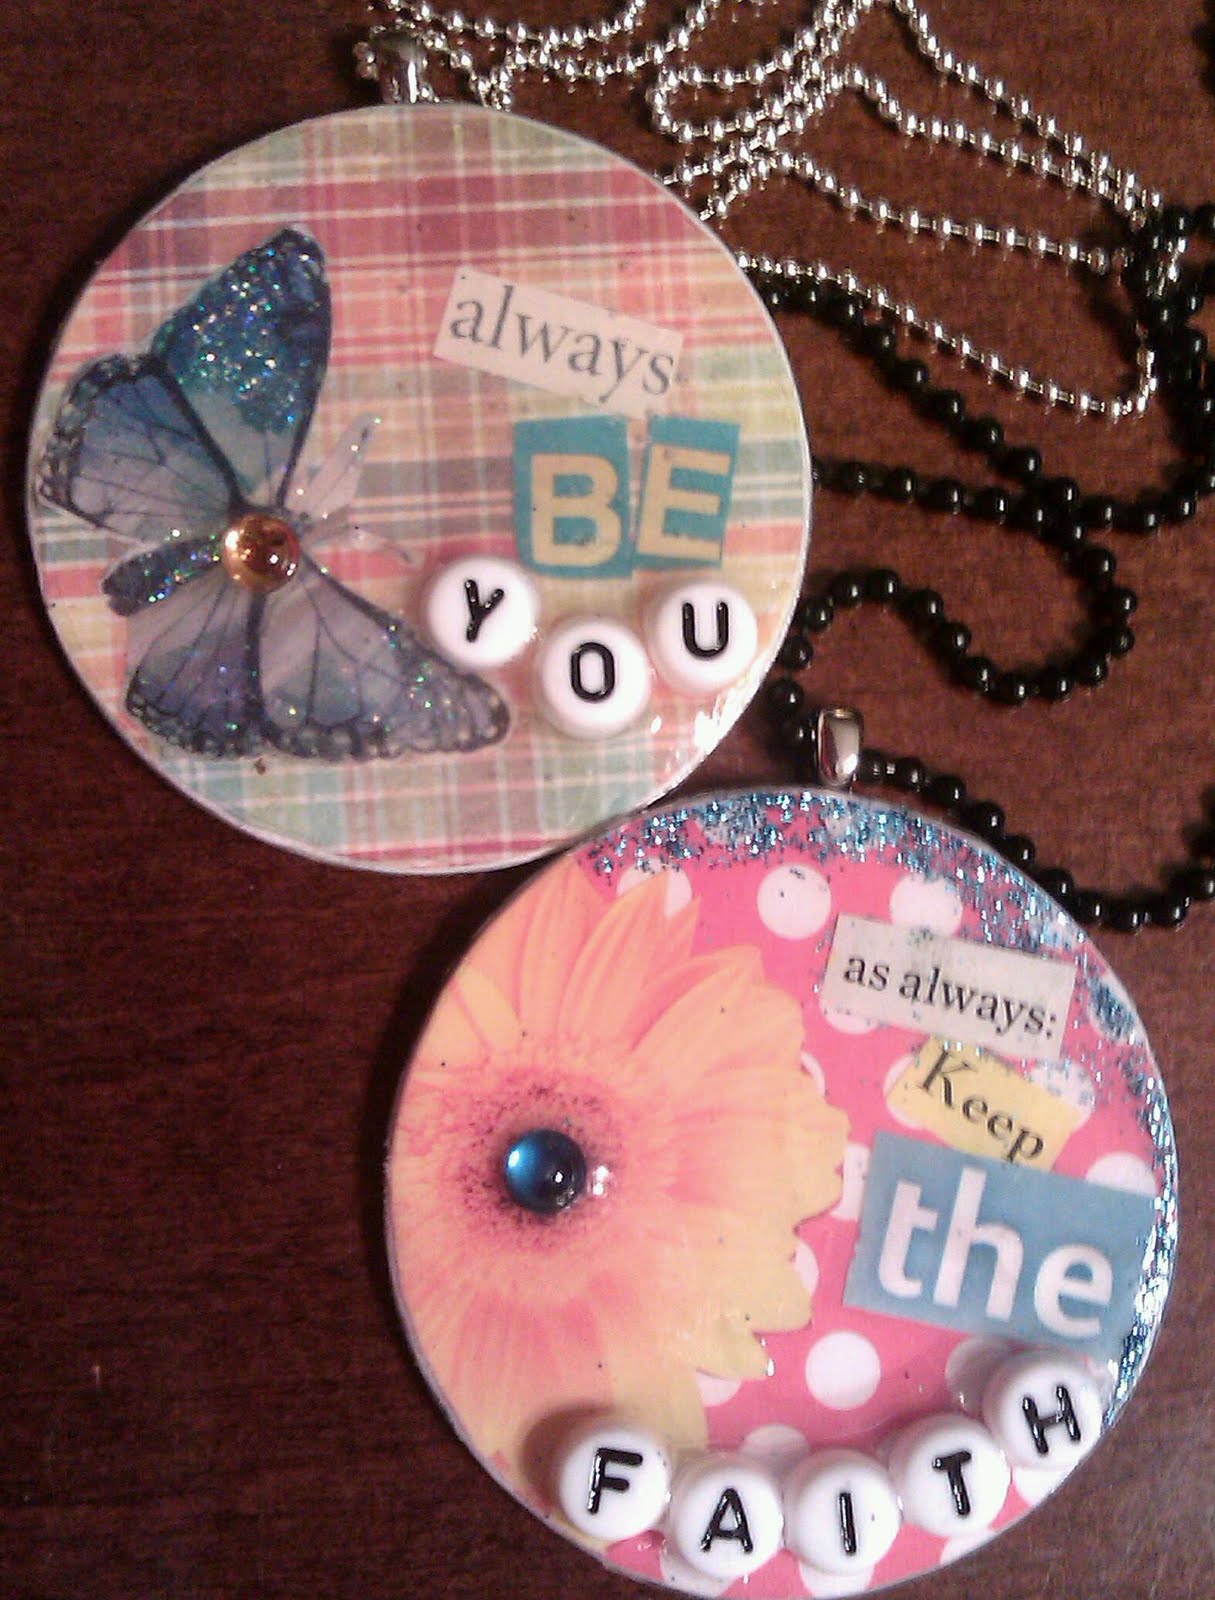
Collaged Washer Jewelry - Part 2


I worked on a couple of different projects last night and I am still having fun. I thought I would share my own mini-tutorial for how to make the washer pendant with the pink flower. Hope it helps you to make your own!


Choose some scrapbook paper, cut out a square (as big as you need), turn it over and trace the washer shape. Cut out the shape and attach it to the washer with Mod Podge. Allow to dry.

Carefully sand the edges of the washer with sand paper or an emery board to remove excess paper from edges. Be careful to only sand in one direction or you risk lifting the paper.

Go through magazines and choose images and phrases and gather your embellishments. Cover the washer with a layer of Mod Podge again and place your embellishments where you would like them. 
Add glitter to areas you would like to be glittery and tap off excess.  

The next photoless step... Coat the entire decorated side of the washer in Mod Podge Dimensional Magic or a similar dimensional product and allow to dry for several hours or overnight. The curing process took about 24 hours for me.  (I can't believe I don't have a picture to show you of this step! I thought I took one, but didn't! Just warning you that the liquid comes out fast so be careful and add only a small amount at at time and carefully remove air bubbles with a straight pin as needed. It will appear cloudy at first but don't be alarmed. It will dry clear.)

 Next, add a heavy duty adhesive to the back and then attach a jewelry bail to the top. Set aside to dry for about an hour.  

Attach your finished product to a cord or a ball chain or some other sort of necklace, whichever you prefer. 


Linking up:
Tip Junkie handmade projects

Todays Creative Blog

Friday, August 12, 2011

Collaged Washer Jewelry - Part 1


I am having so much fun with my new projects! I am still perfecting the techniques but I am loving the results so far! My daughters are excited that they have another couple of necklaces to choose from and I am thinking that I may even venture out into the world wearing one of my creations at some point. Who knows!  I am working on a couple others that I will be sharing in a bit. Sooooo much fun to do these! I am letting myself play. No real rules on this one. LOVE that!!

Thursday, August 11, 2011

Washer Jewelry

I have been inspired by my Pinterest.com collection yet again. (Feel free to follow me, if you would like. Jennifer Avila) It is just the coolest place ever! Definitely my guilty pleasure. I am never at a loss for awesome stuff to inspire me and lately I have been majorly inspired to do a bunch of new projects. Yesterday, I took a trip to Hobby Lobby and brought home all sorts of jewelry findings and a couple packages of beads that happened to be 50% off!! (My absolute favorite way to buy things is on sale. In fact, pretty much the ONLY way I buy stuff.) I also got some Mod Podge Dimensional Magic, which is the key to these sorts of things. I had to take another short trip to the hardware store around the corner and picked up 3 packages of various sizes of fender washers. They are about $1.25 a package. So, very cheap to create these treasures. I just LOVE that!! Then, I stayed up getting things together so that I could whip out my new projects. I found a pretty good tutorial here: Creations by Kara. My first one is cute, though not perfect. I am learning as I go. I discovered that the liquid spreads quickly so you have to be prepared with any embellishments that you are adding. I would also say that it is important to have a straight pin handy to coax the air bubbles off of the surface. To assist in the drying process, I used my little 6 inch fan and put the washers directly in front of that which helped speed things up a lot. I am still learning what will work for hanging/wearing the jewelry. Should it go on leather cording? Maybe ball chain? Hemp? Still working with those options. In any case, I am loving it and have several in the curing process right now. The next step for me is collaging. I am LOVING the collaged washer results so far. I will be posting those next.


Linking up:
Tip Junkie handmade projects

Todays Creative Blog

Saturday, August 6, 2011

Crockpot Chocolate Fondue


Let me introduce you to the single most amazing thing that could ever  happen to a chocolate loving family- Crockpot Chocolate Fondue!! Now this was perhaps the easiest yummiest dessert that we have ever tried. Even easier than a boxed brownie mix, our family's quick-I-need-chocolate staple. I suggest you gather up your tiny crockpot and the few necessary supplies and make some yourself. What makes the experience even sweeter is when you eat it together as a family and ooh and ahhh over its' simplicity and with chocolate all over your face, enjoy Shrek as it plays on Cartoon Network. Quality time, I tell ya! Gotta love that. :)
The following is a conglomeration of several recipes that I discovered on my quest for the perfect one. This is how we did it:


Not. Sharing. My. Fondue.
Chocolate Crockpot Fondue
Marshmallows were her fave.

Ingredients:

1 cup half and half
1/4 cup butter
24 ounces semisweet chocolate chips (you can use milk if you prefer or a combination of any)
1 tsp vanilla

Instructions:

Accidents happen...

Preheat small crockpot about 30 minutes on low heat. Set aside.
Combine half and half and butter in a saucepan over medium heat until it comes to a simmer, stirring constantly. Remove from the heat. Add chocolate and vanilla and stir until combined and creamy. Transfer to pre-warmed crockpot and keep on warm setting. Serve immediately with fruit, marshmallows, pound cake, Nilla wafers, graham crackers, pretzels or anything else that makes you happy.
He favored the Nilla wafers.

Here is what I found out about leftovers, if there are any...

Cover leftover mixture and refrigerate. To reheat, place crock in microwave, uncovered, for 30 second intervals on 50% power, stir and repeat until chocolate is smooth again, but be extra careful not to overheat or the chocolate will burn.

  1.  
Powered by Blogger.